A sneak preview from my new Before & After course...


I’m pleased to announce I’ve got a brand new video course: in ‘Before & After’, I show you the reasoning behind and the postprocessing of ten of my favourite images. From portraits over landscapes to cityscape, from available light to multi-flash set-ups and from one-click postprocessing in Lightroom to advanced layered workflows in Photoshop, it’s all there!

This 3-hour course will soon be available for US$99, which I think is excellent value but the good news is that until noon PST, October 6 you can also get it as part of the 5DayDeal Complete Bundle.

For those of you who don’t know the 5DayDeal yet, it’s a bundle of training and tools for photographers (tutorials, Lightroom presets, Photoshop actions) by some of the world’s best educators, including people like Scott Kelby and Elia Locardi. The 5DayDeal consists of a Main Bundle (20 hours of training, worth over US$1.000 for US$98) but the best value is when you add the two optional upgrades to your cart during checkout: the Pro Bundle Upgrade (US$49) adds another US$1.000 worth of training for US$39 and the Charity Bundle Upgrade, which has my course in it, adds another US$2.000 worth of training for only US$39 extra.

Some of the training in the 5DayDeal, like Elia Locardi’s excellent 15 hour Photographing the World tutorial is worth more than the price of the Complete Bundle. For me, this tutorial alone makes the 5DayDeal Complete Bundle worth the purchase!

But back to my brand new course: below, you can get a free preview of one of its ten chapters. I hope you enjoy it!

Did you find this video interesting? Did you learn something for it or did it inspire you to go out and make some street scenes of your own? Then think of all you can learn from all the other videos in my course, let alone all the videos in the 5DayDeal bundle. The Main bundle of the 5DayDeal bundle has over 20 hours of training and tutorials on various aspects of photography and image editing. If you add the Pro Bundle Upgrade and the Charity Bundle Upgrade, which includes my new course, the total amount of training surpasses even 75 hours!

Extra bonus for MoreThanWords customers!

One important last thing... I know you probably have your choice of sources to purchase the 5DayDeal from. That's why I'll throw in a cool bonus! lf you purchase through the links on this page, you can choose 1 of the following tutorials of mine for free! *

  1. My Photoshop for Lightroom Users course (a $89 value)

  2. OR: my Lightroom Library beyond the Basics course (a $79 value)

  3. OR: my Texture Pack 1 + 2: a set of 45 super high-res textures and backgrounds (a $50 value)

  4. OR: my Texture Pack 3, 4 & 5: a set of 60 super high-res textures and backgrounds (a $50 value)

  5. OR: my Location Lighting Masterclass course (a $89 value)

  6. OR: my Lightroom Presets Pack and my Creative Profiles Starter Pack (a $50 value)

  7. OR: my Black & White Creative Profiles Pack and my Creative Profiles Pack, Vol. II (a $50 value)

  8. OR: my Flash!Back, Vol. II course (which was in the 2022 5DayDeal bundle) (a US$99 value)

  9. OR: my Flash!Back, Vol. III course (which was in the 2023 5DayDeal bundle) (a US$99 value)

  10. OR: My Brand New Kolkata Colors Presets & Profiles Pack!

You'll receive an email from me after the 5DD ends, to let me know which of the bonuses you'd like.

Below is an overview of all the training in the Main Bundle and the Upgrades. There’s something for everyone, ranging from portrait photography over landscape photography to cityscapes and even real estate photography.

The 5DayDeal is the best investment you can do this fall to improve your photography!

A sneak preview from my new course...

As you may know by now, you have until October 17 to take advantage of the 5DayDeal. The 5DayDeal is a bundle of training and tools for photographers (tutorials, Lightroom presets, Photoshop actions) that is offered for only 5 days at an incredible discount: the normal value of the over 45 hours of training included in the bundle is no less than US$2,100, but until October 17 you can get it for only US$98, that’s a whopping 95+% savings!

I am very honoured that the folks over at 5DayDeal have asked me to contribute a course. Last year, I made a course in which I went deeper into the thought process, the lighting and the editing of ten of my favourite flash images. It was called Flash!Back II and as it was very well received, I thought for this year I would not change a winning theme and so I created… Flash!Back III. Below you can watch one of the ten videos from the course for free, until October 17, noon PST, which is also when the 5DayDeal ends.

Did you find this video interesting? Did you learn something for it or did it inspire you to go out and make some portraits of your own? Then think of all you can learn from all the other videos in my course, let alone all the videos in the 5DayDeal bundle. The MAIN bundle of the 5DayDeal bundle has over 45 hours of training and tutorials on various aspects of photography and image editing. But hurry, because time is running out and the same bundle never goes back on sale!

Extra bonus for MoreThanWords customers!

One important last thing... I know you probably have your choice of sources to purchase the 5DayDeal from. That's why I'll throw in a cool bonus! lf you purchase through the links on this page, you can choose 1 of the following tutorials of mine for free! *

  1. My Photoshop for Lightroom Users course (a $89 value)

  2. OR: my Lightroom Library beyond the Basics course (a $79 value)

  3. OR: my Texture Pack 1 + 2: a set of 45 super high-res textures and backgrounds (a $50 value)

  4. OR: my Texture Pack 3, 4 & 5: a set of 60 super high-res textures and backgrounds (a $50 value)

  5. OR: my Location Lighting Masterclass course (a $89 value)

  6. OR: my Lightroom Presets Pack and my Creative Profiles Starter Pack (a $50 value)

  7. OR: my Black & White Creative Profiles Pack and my Creative Profiles Pack, Vol. II (a $50 value)

  8. OR: my Flash!Back, Vol. II course (which was in last year's 5DayDeal bundle) (a US$99 value)

You'll receive an email from me after the 5DD ends, to let me know which of the bonuses you'd like.

If you’re into portrait photography (and if you’re not, you would not be on this page), below is a breakdown in green of all the courses in the 5DayDeal that relate to portrait photography. As you can see, there’s quite a lot of them!

101 Tips for Travel Photography - 06 - Try an environmental portrait for a change...

To celebrate the launch of my new PDF ebook ‘101 Tips for Travel Photography’ and because July and August are top travel months worldwide, I’ll post 10 tips from the book over the months of July and August. This sixth tip comes from Chapter 4, which is all about photographing people.

SAVE US$20 ON THE DELUXE EDITION

Save 33% on the Deluxe Edition. No discount code needed. Now only US$39.95 instead of US$59.95 for the 252 page PDF ebook + a 3 hour video tutorial detailing how I photographed and edited 10 of my favourite images from the book.

Beyond the classic close-up portrait
Give environmental portraiture a try

Everyone knows the typical travel portraits of beautiful character faces that you encounter on a trip. You can find several of them in this book. The recipe for such portraits is quite simple: a bit of soft light (whether or not you made it yourself with a flash) and a fast portrait lens, such as an 85 mm f/1.8 on a full frame or a 50 to 60 mm on an APS-C camera. By using that lens at it’s fastest aperture (lowest f-stop number), you can blur even the ugliest background into oblivion. If your subject is a bit photogenic, and you can focus on the eye closest to the camera, you’re going to have to try really hard to screw up a shot like that.

But… portraits like those have one drawback: they offer very little context. For example, I think the photo of the man on the right is quite a nice portrait that completely follows the recipe I listed above. Of course you don’t pass up on such an interesting character face. I photographed it with Fujifilm’s 110 mm portrait lens for the GFX. This lens has a large maximum aperture of f/2, comparable to an 85 mm f/1.4 on full frame. The only thing is... you have to take my word for it that it was made in Ethiopia, because you don’t see anything of the environment. It might just as well have been made in New York or in Brussels. That is why you should also try an environmental portrait: a portrait in which you photograph someone in their natural surroundings.

With those portraits you usually use a much wider lens (like a 24 mm on full-frame format). Make sure that you get close enough to your subject – otherwise they will be too small in the image frame – but not too close either, because then you risk getting distortion. Also make sure that you include enough interesting context, but not too much clutter.


I’d like to add one tip to the 101 tips: buy this book!
— Johan Depoortere

Did you like this tip? In my new ‘101 Tips for Travel Photography’ you can find 100 more! This PDF ebook is available in two editions: with the Standard Edition, you get the 252 page PDF ebook as a download but 90% of buyers opt for the Deluxe Edition. The Deluxe Edition is currently on sale (US$39.95 instead of US$59.95). So, for only US$ 10 more than the Standard Edition (US$29.95), you’ll also receive access to a 3 hour video tutorial in which I show you how I photographed and edited 10 of my favourite images from the book.

Here’s a sampler of the layout and the contents of this 252 page PDF ebook.


Included in the Deluxe Edition is this three hour video tutorial in which I explain my approach to and the editing of 10 of my favourite images from the book.


101 Tips for Travel Photography - 05 - Using Layers


Did you sign up for my free travel photography webinar yet?
⬇ Click the link below! ⬇


To celebrate the launch of my new PDF ebook ‘101 Tips for Travel Photography’ and because July and August are top travel months worldwide, I’ll post 10 tips from the book over the month of July. This fifth tip comes from Chapter 8, which is all about composition. One of the more advanced tips - not so much in terms of difficulty but rather because you have to be “ready” for it as a photographer - is to use layers in your image.


SAVE US$20 ON THE DELUXE EDITION

Save 33% on the Deluxe Edition. No discount code needed. Now only US$39.95 instead of US$59.95 for the 252 page PDF ebook + a 3 hour video tutorial detailing how I photographed and edited 10 of my favourite images from the book.

Layers aren’t only for clothes.
Make sure to have them in your images, too

This is tip #69 from the book ‘101 Tips for Travel Photography’: Layers aren’t only for clothing. Make sure you have them in your images, too…

A photo only has a height and a width, while the reality you are trying to capture in that photo is three-dimensional. One of the challenges for a photographer is therefore to try to convey that depth in the photo. There are various techniques for this. Some we discuss elsewhere in this book, such as using backlighting and working with a frame within a frame. A slightly more advanced idea is to work with layers. By “advanced” I don’t mean that this technique is difficult, but rather that as a photographer you need a certain creative maturity to start to include it in your photographic toolbox. I myself have experienced the power of layers almost accidentally. Until a few years ago I would have found the small photo on the right page to be the better one, and the large photo on the left, less strong. Now, my opinion has changed. The small photo is a nice registration. But the big photo on the left page is much more immersive: it gives you the feeling of being there. And that’s what travel photography is all about. The primary layer in this photo is still the background, but the secondary layer, the foreground, helps to frame the subject, literally and figuratively. To ensure that your secondary (and sometimes even tertiary) layer does not become too dominant, you can do the following:

  • Make the secondary layer smaller than the primary – I obviously didn’t do that here!

  • Darken the secondary layer.

  • Make sure the secondary layer is not completely visible. By not including the front man’s face, the viewer’s eye is automatically sent to the faces in the back anyway.

  • Make sure that the secondary layer is not the sharpest part of your photo, for example by working with motion blur or shallow depth of field. To help your luck a hand, you can set the camera to continuous shooting (“burst”) mode.

A flash just outside of the frame to the right, parallel to the wall, also helped to ensure that the rickshaw wallah in the back was put in the spotlight.


I’d like to add one tip to the 101 tips: buy this book!
— Johan Depoortere

Did you like this tip? In my new ‘101 Tips for Travel Photography’ you can find 100 more! This PDF ebook is available in two editions: with the Standard Edition, you get the 252 page PDF ebook as a download but 90% of buyers opt for the Deluxe Edition. The Deluxe Edition is currently on sale (US$39.95 instead of US$59.95). So, for only US$ 10 more than the Standard Edition (US$29.95), you’ll also receive access to a 3 hour video tutorial in which I show you how I photographed and edited 10 of my favourite images from the book.

Here’s a sampler of the layout and the contents of this 252 page PDF ebook.


Included in the Deluxe Edition is this three hour video tutorial in which I explain my approach to and the editing of 10 of my favourite images from the book.


101 Tips for Travel Photography - 04 - How to approach people?

To celebrate the launch of my new PDF ebook ‘101 Tips for Travel Photography’ and because July and August are top travel months worldwide, I’ll post 10 tips from the book over the month of July. In this fourth tip, I talk about how you can approach people to make their portrait.

SAVE US$20 ON THE DELUXE EDITION

Save 33% on the Deluxe Edition. No discount code needed. Now only US$39.95 instead of US$59.95 for the 252 page PDF ebook + a 3 hour video tutorial detailing how I photographed and edited 10 of my favourite images from the book.

How to approach people… can’t buy you happiness
“No” you have, “Yes” you can get…

This is tip #28 from the book ‘101 Tips for Travel Photography’: How to approach people. “No you have”, “Yes you can get”.

One of the most frequently asked questions about travel photography is how you approach people to portray them. It helps to imagine that you have nothing to lose, except maybe a small dent in your ego: “No” you have, “yes” you can get. Take it from someone who once had to sell life insurance door-to-door for an entire week as part of a job training: there are worse things to try to sell than a photo. That week never seemed to end! By comparison, asking complete strangers to photograph them is a walk in the park. Below are a few tips:

  • Watch your non-verbal communication: make sure you come across as friendly and non-threatening. Also pay attention to your intonation.

  • Most people understand what you mean when you smile and in the mean time wave your camera at them. I then pause briefly and wait for a response whether I can continue or not.

  • Respect it when the other doesn’t want to be photographed. It’s no use to steal a photo when the subject is looking cross at you.

  • While cycling through Iran, where I made the photo on the left, I had an Iranian friend write in Farsi “Can I take your photo?” on a sticker that I had stuck to my lens hood. I then showed the lens hood to my potential subjects. I also brought a card (again in Farsi) with more explanation about who I was and what I was planning to do with the photos.

  • Try to memorize a few words of the language, even if only phonetically. For example, in Hindi I can (more or less) say “Look here please”, “Look over there” and “Look into the light.”

  • Finally, in this app era, we shouldn’t forget our smartphones: a free app like Google Translate allows you to translate sentences online. For foreign scriptures, such as Hindi, you will also be shown a phonetic translation and you can even have the sentence pronounced.


I’d like to add one tip to the 101 tips: buy this book!
— Johan Depoortere

Did you like this tip? In my new ‘101 Tips for Travel Photography’ you can find 100 more! This PDF ebook is available in two editions: with the Standard Edition, you get the 252 page PDF ebook as a download but 90% of buyers opt for the Deluxe Edition. The Deluxe Edition is currently on sale (US$39.95 instead of US$59.95). So, for only US$ 10 more than the Standard Edition (US$29.95), you’ll also receive access to a 3 hour video tutorial in which I show you how I photographed and edited 10 of my favourite images from the book.

Here’s a sampler of the layout and the contents of this 252 page PDF ebook.


Included in the Deluxe Edition is this three hour video tutorial in which I explain my approach to and the editing of 10 of my favourite images from the book.


101 Tips for Travel Photography - 03 - To pay or not to pay?

To celebrate the launch of my new PDF ebook ‘101 Tips for Travel Photography’ and because July and August are top travel months worldwide, I’ll post 10 tips from the book over the month of July. In this third tip, I’ll tackle a question I get a lot: Should you pay when you make somebody’s portrait? Find out my take on this after the break.

SAVE US$20 ON THE DELUXE EDITION

Save 33% on the Deluxe Edition. No discount code needed. Now only US$39.95 instead of US$59.95 for the 252 page PDF ebook + a 3 hour video tutorial detailing how I photographed and edited 10 of my favourite images from the book.

Money can’t buy you happiness
There are many ways to pay for a picture

This is tip #25 from the book ‘101 Tips for Travel Photography’: Money can’t buy you happiness… There are many ways to pay for a picture.

One of the frequently asked questions about travel photography is ‘Do you pay for portraits?’ You could write quite the philosophical essay about the subject, but I’m trying to stay pragmatic on this page: you’re the one who wants the photo, so if the other party wants money for it, that is their good right. So I have no problem paying for a portrait, if I really think it’s worth it. If I put a sadhu on a boat on the Ganges for half an hour to make his portrait , I would even find myself quite stingy not to pay him for his time... The same goes for portraits in the Ethiopian Omo Valley. They won’t let you take pictures there if you don’t pony up. And I don’t blame them. I’d ask to get paid, too if I looked that photogenic! It’s just a matter of supply and demand. Besides paying explicitly with cash, there are many other ways to ‘pay’ in a less transactional way, however:

  • One of them – the Instax print – even has its own tip (number 11). Although I don’t really see it as payment, more as a thank you.

  • What I also often do, is buy something from the person I was photographing. For example, I bought the bubble blower from the man on the left after I took his picture. He was happy, my son was happy and I was happy. Triple joy for only 50 rupees (less than one euro).

  • There are also quite a few occasions where I don’t pay, because the situation just feels that way. A simple, heartfelt ‘Thank you!’ is something almost everyone understands and often is enough.

The payment for the travel portrait on the right page, that I made during a bicycle trip from Georgia to Armenia consisted of purchasing a far too heavy bag of carrots.


I’d like to add one tip to the 101 tips: buy this book!
— Johan Depoortere

Did you like this tip? In my new ‘101 Tips for Travel Photography’ you can find 100 more! This PDF ebook is available in two editions: with the Standard Edition, you get the 252 page PDF ebook as a download but 90% of buyers opt for the Deluxe Edition. The Deluxe Edition is currently on sale (US$39.95 instead of US$59.95). So, for only US$ 10 more than the Standard Edition (US$29.95), you’ll also receive access to a 3 hour video tutorial in which I show you how I photographed and edited 10 of my favourite images from the book.

Here’s a sampler of the layout and the contents of this 252 page PDF ebook.


Included in the Deluxe Edition is this three hour video tutorial in which I explain my approach to and the editing of 10 of my favourite images from the book.


101 Tips for Travel Photography - 02 - Take It Easy


To celebrate the launch of my new PDF ebook ‘101 Tips for Travel Photography’ and because July and August are top travel months worldwide, I’ll post 10 tips from the book over the month of July. Where the previous tip was very practical ("What kind of photo gear do I take with me on a trip?"), this one is of a more philosophical nature: how do you deal with "travel photography stress", the sometimes overwhelming and frankly paralysing urge to score great images when travelling?

SAVE US$20 ON THE DELUXE EDITION

Save 33% on the Deluxe Edition. No discount code needed. Now only US$39.95 in stead of US$59.95 for the 252 page PDF ebook + a 3 hour video tutorial detailing how I photographed and edited 10 of my favourite images from the book.

One good image a day…
… is more than many pros can say

This is tip #22 from the book ‘101 Tips for Travel Photography’: One good image a day… is more than many pro’s can say

Do you know travel photography stress? It is the pressure you feel as a traveling photographer to return home with a series of killer images. Or maybe you make it even harder on yourself by wanting to update your Instagram or Facebook feed while traveling. The fact that we are all continuously exposed to a stream of high-quality travel photos from others through the same social media channels does not help things, of course. Personally, I prefer quality over quantity: one really good photo per day that you are traveling, is already fantastic. The great Ansel Adams, one of the giants of landscape photography, considered as little as twelve good photos a year to be ‘a good crop’. So don’t try (or expect) to put together your entire travel portfolio over an extended weekend and if you do succeed, you should be writing this book instead of reading it! I took this photo of a charcoal monger in Old Delhi at the start of a two-week trip. I was so happy with this image that any other good photo I took on that trip would just be icing on the cake.

Twelve significant photos a year is a good crop
— Ansel Adams

The man stood outside in harsh, unpleasing sunlight. I tried toexplain to him that I wanted to do the portrait in his shop. There was much less light over there, but the light that still came in was of a much better quality. In addition, I could also keep the background dark. I was only too happy that I had a fast portrait lens on my camera instead of a travel zoom (see also tip 8). Even at an aperture of f/1.2, I had to raise my ISO to 1.600 to get a fast enough shutter speed.

I also tried a wider environmental portrait as you can see in the bottom right of the screenshot, but I like the classic portrait shot much better, mainly because of the strong look in his eyes.


I’d like to add one tip to the 101 tips: buy this book!
— Johan Depoortere

Did you like this tip? In my new ‘101 Tips for Travel Photography’ you can find 100 more! This PDF ebook is available in two editions: with the Standard Edition, you get the 252 page PDF ebook as a download but 90% of buyers opt for the Deluxe Edition. The Deluxe Edition is currently on sale (US$ 39.95 instead of US$59.95). So, for only US$ 10 more than the Standard Edition, you’ll also receive access to a 3 hour video tutorial in which I show you how I photographed and edited 10 of my favourite images from the book.

Here’s a sampler of the layout and the contents of this 252 page PDF ebook.


Included in the Deluxe Edition is this three hour video tutorial in which I explain my approach to and the editing of 10 of my favourite images from the book.


101 Tips for Travel Photography - 01 - What's in my camera bag?


To celebrate the launch of my new PDF ebook ‘101 Tips for Travel Photography’ and because July and August are top travel months worldwide, I’ll post 10 tips from the book over the month of July. We’ll start with one of the more frequently asked questions: what camera do you take with you? Read my thoughts below these links.

SAVE US$20 ON THE DELUXE EDITION

Save 33% on the Deluxe Edition. No discount code needed. Now only US$39.95 instead of US$59.95 for the 252 page PDF ebook + a 3 hour video tutorial detailing how I photographed and edited 10 of my favourite images from the book.

The ideal travel camera…
… is the one you already have at home

This is tip #6 from the boek ‘101 Tips for Travel Photography’: The ideal travel camera…. is the one you already have at home

It may seem crazy, but the specs of your camera body should probably be the last thing to worry about in travel photography. All cameras purchased in recent years offer a potential image quality that travel photography giants like Steve McCurry could only dream of in their heyday. A 24 megapixel camera, nowadays about the entrylevel resolution, delivers photos of 6,000 x 4,000 pixels. For large format printing, a resolution of 150 dpi (dots per inch) is sufficient. So, you can easily print your travel photos up to 40 inches or one meter wide. With special software such as Gigapixel AI from Topaz Labs, you can even double those dimensions without too much loss in quality. Unless you’re planning on cropping heavily (as is sometimes necessary with wildlife photography), the camera you already have may be enough and that hard-earned cash you’re lusting to blow on a camera upgrade might be better spent on a plane ticket or a fast portrait lens (see below). If you do plan to purchase a new camera, consider a mirrorless one. This type no longer has an optical viewfinder but an electronic one, which has its advantages:

  • Due to the absence of a mirror, a mirrorless camera is smaller, lighter and quieter. These are all advantages in travel photography.

  • With a mirrorless camera, you can already see the photo in your viewfinder before you make it. So you have less chance of getting over- or underexposed photos. That real-life preview is also very useful for flash photography.

For a lot of you reading this, you probably don’t have to travel far to have more sun than in your home country. The bright sun can make assessing your photos on the LCD screen of a DSLR quite difficult. With a mirrorless camera, you can review the photo in the electronic viewfinder, with your eye and head providing shade and therefore a better viewing environment. Another aspect that you may want to pay a little more attention to is whether your new camera is sufficiently dust and (splash) waterproof. When traveling, your gear is exposed to the elements a lot more than at home.

Finally, a second camera body is not a superfluous luxury. It can serve as a backup in case of breakage or theft. I have traveled for years with two identical bodies: two Fujifilm X-Pro 2s or two Fujifilm X-T3s, with a wide-angle zoom on one and a portrait lens on the other. I barely had to change lenses, which allowed me to keep my sensors clean. Those two APS-C bodies weighed the same as one full-frame camera, but they did offer me extra flexibility and security. Now that I mainly work with Fujifilm’s GFX system, I sometimes use the super compact Fujifilm X100 as a backup camera.

In addition to my camera, I also bring a fast portrait lens and a wide angle zoom. I find that two lenses cover 95% of my travel photo needs. If you are shooting wildlife, you will probably want to bring a fast telephoto zoom or an even faster long prime like a 400 or 600 mm. Personally, as I don’t photograph wildlife, I like to save some weight on lenses, because I also like to bring a flash and something to diffuse my light, like an umbrella or a softbox. More about those in a future blog post.

One last remark: I sometimes get asked by photographers who already have a camera, which (cheaper) camera they should buy for their travels, the idea being that they don’t want to take their main camera because it’s too expensive and they’re afraid of theft. I have never found that a good reason not to bring your best camera to a trip. Unless you’re going to a really dangerous place, I see no reason to bring, let alone buy a cheaper camera out of fear of getting your better camera stolen. I’d rather use (part of) the money to get a decent insurance for my photo gear wherever I am, because statistically, as you’re probably more home than abroad, chances are that if your camera ever gets stolen, it will be where you use it most.

So, let met know in the comments: what is your travel camera?


I’d like to add one tip to the 101 tips: buy this book!
— Johan Depoortere

Did you like this tip? In ‘101 Tips for Travel Photography’ you can find 100 more! This PDF ebook is available in two editions: with the Standard Edition, you get the 252 page PDF ebook as a download but 90% of buyers opt for the Deluxe Edition. The Deluxe Edition is currently on sale (US$39.95 instead of US$59.95). So, for only US$ 10 more than the Standard Edition, you’ll also receive access to a 3 hour video tutorial in which I show you how I photographed and edited 10 of my favourite images from the book.

Here’s a sampler of the layout and the contents of this 252 page PDF ebook.


Included in the Deluxe Edition is this three hour video tutorial in which I explain my approach to and the editing of 10 of my favourite images from the book.


Topaz Photo AI Webinar Highlight: turn every camera into a 100 megapixel monster

In my recent Topaz Photo AI webinar, I gave lots of examples of how Topaz Photo AI can help in reducing noise, increasing sharpness and upsampling your images but probably the most awe-inspiring one example was the one where I upsampled a 25 megapixel image to a 100 megapixel image using three different techniques: two in Photoshop and one with Topaz Photo AI. The result will surprise you.

P.S. If you're wondering why you would need a 100 megapixel image, there's another way of looking at this: with Topaz Photo AI, you can crop away three quarters of an image and upscale the remainder to the size of your original, with very little (if any) noticeable loss in quality.

Interested in purchasing Topaz Photo AI? You can do so using the links below.

  • Topaz Photo AI is available here. It’s only US$159 instead of US$199 until April 21st

  • Topaz Denoise AI is available here.

  • Topaz Sharpen AI is available here.

  • Gigapixel AI is available here.

Already have Topaz plug-ins? Log in to your account using this link and you will see your special upgrade price.


Remember that if you can also get the Image Quality Bundle for just under US$200 and that entitles you to a free copy of Photo AI as well.

Want to rewatch the full webinar? You can do so below…

Topaz Photo AI Webinar Replay

Yesterday, I did a webinar about Topaz Photo AI, my go-to application for image sharpening, noise reduction and image enlargement. I think the webinar contains some pretty strong examples about the power of Topaz Labs in general and Photo AI in particular. Make sure to definitely watch the last part, in which I upscale a 26 megapixel image to a 100 megapixel image, that is sharper than… the original 100 megapixel image!

Interested in purchasing Topaz Photo AI or my Ultimate Lightroom Masking class or my 101 Tips for Travel Photography Deluxe ebook? You can do so using the links below.

  • My Ultimate Lightroom Masking course is available here.

  • The Deluxe version of the 101 Tips for Travel Photography is available here. Both are currently on sale for US$39.95 instead of US$59.95

  • Topaz Photo AI is available here.

  • Topaz Denoise AI is available here.

  • Topaz Sharpen AI is available here.

  • Gigapixel AI is available here.

Already have Topaz plug-ins? Log in to your account using this link and you will see your special upgrade price.


Remember that if you can also get the Image Quality Bundle for just under US$200 and that entitles you to a free copy of Photo AI as well.

Lightroom Masking Tip: Dramatic Black & White and advanced masking

In this new video, I am turning a dull architecture shot into a dramatic Black & White in minutes, using a Creative Profile and some advanced masking, all in Lightroom Classic. Check it out below!

Creative Street Profiles, Vol. 01

10 Creative Black & White Profiles that turn your images into dramatic Black & Whites at the click of a button!

Introducing Ultimate Lightroom Masking

Did you find this interesting? This is only a glimpse of what the new masks that were introduced in Lightroom 11 and further (dramatically) improved in Lightroom 12, can do. If you want to know ALL about them and drastically cut down on your Lightroom editing time, all while making those edits better, then sign up for my upcoming ‘Ultimate Lightroom Masking’ 2-part Masterclass. The video below tells you all about it.

Part 1 is on Monday, March 27, 8 PM Brussels time, part 2 is on Wednesday, March 29, 8 PM Brussels time. But don’t worry if you can’t make it to the live sessions because everything will be recorded and your registration also entitles you to that recording at no extra cost so you can watch either the live, the recording or both!

Registration is now open. Take advantage of the discounted early bird rate using the links below. For a limited time, you pay only US$39.95 (including tax) instead of US$59.95 for both sessions, including the recording!

Lightroom Masking Tip: How to Equalize Portrait Lighting

The new masks in Lightroom Classic are incredibly powerful and let you do things that you used to need Photoshop for – and some pretty advanced Photoshop skills at that! In this free video, I’ll show you how to equalize the lighting in a portrait.

Introducing Ultimate Lightroom Masking

Did you find this interesting? This is only a glimpse of what the new masks that were introduced in Lightroom 11 and further (dramatically) improved in Lightroom 12, can do. If you want to know ALL about them and drastically cut down on your Lightroom editing time, all while making those edits better, then sign up for my upcoming ‘Ultimate Lightroom Masking’ 2-part Masterclass. The video below tells you all about it.

Part 1 is on Monday, March 27, 8 PM Brussels time, part 2 is on Wednesday, March 29, 8 PM Brussels time. But don’t worry if you can’t make it to the live sessions because everything will be recorded and your registration also entitles you to that recording at no extra cost so you can watch either the live, the recording or both!

Registration is now open. Take advantage of the discounted early bird rate using the links below. For a limited time, you pay only US$39.95 (including tax) instead of US$59.95 for both sessions, including the recording!

Lightroom Masking Tip: How to create an Adaptive Dramatic Sky Preset

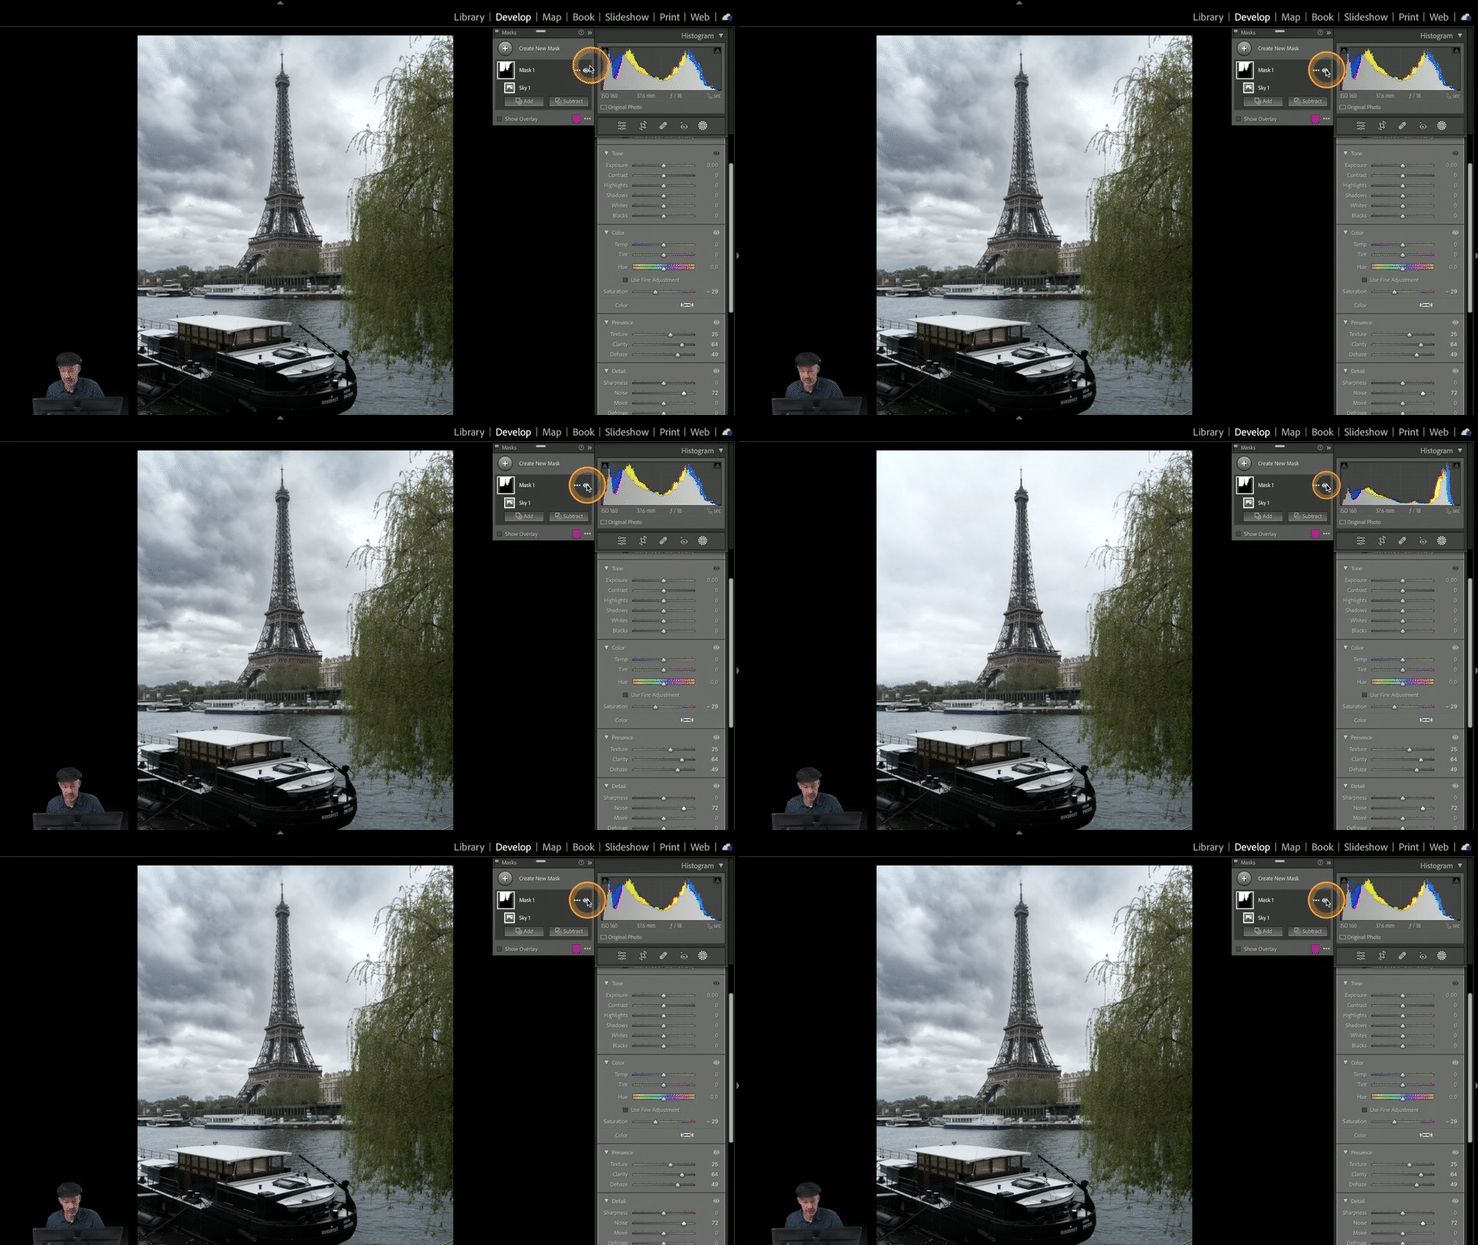
In this video, you’ll not only learn which are the best Lightroom sliders to make the sky in an image look more dramatic but I’ll also show you how you can create an Adaptive preset that you can reuse on other images with a single click.

Introducing Ultimate Lightroom Masking

Did you find this interesting? This is only a glimpse of what the new masks that were introduced in Lightroom 11 and further (dramatically) improved in Lightroom 12, can do. If you want to know ALL about them and drastically cut down on your Lightroom editing time, all while making those edits better, then sign up for my upcoming ‘Ultimate Lightroom Masking’ 2-part Masterclass. The video below tells you all about it.

Part 1 is on Monday, March 27, 8 PM Brussels time, part 2 is on Wednesday, March 29, 8 PM Brussels time. But don’t worry if you can’t make it to the live sessions because everything will be recorded and your registration also entitles you to that recording at no extra cost so you can watch either the live, the recording or both!

Registration is now open. Take advantage of the discounted early bird rate using the links below. For a limited time, you pay only US$39.95 (including tax) instead of US$59.95 for both sessions, including the recording!

Lightroom Masking Tip: How to emphasize structure and detail in Clothes without making the people wearing them look older

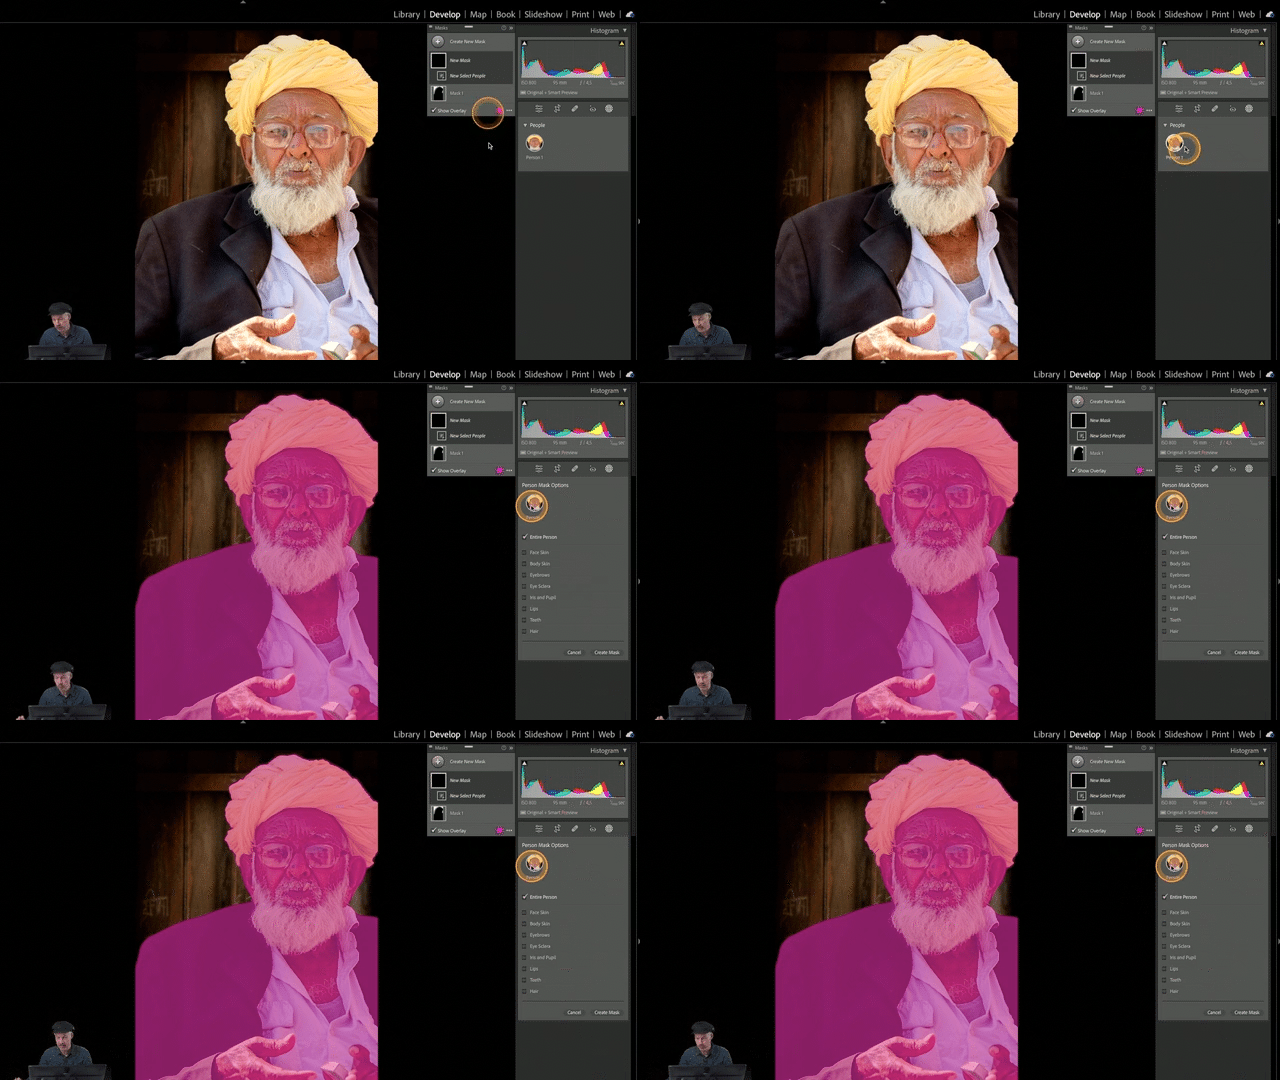
In this video, I’ll show you an out-of-the-box way to select (only) the clothes of the subject in your photo, so you can emphasize their texture without making the person wearing them look older. And best of all: this trick requires no brushing whatsoever, because it uses the new Select People mask that was introduced in Lightroom 12.

Introducing Ultimate Lightroom Masking

Interested? This is only a glimpse of what the new masks that were introduced in Lightroom 11 and further (dramatically) improved in Lightroom 12, can do. If you want to know ALL about them and drastically cut down on your Lightroom editing time, all while making those edits better, then sign up for my upcoming ‘Ultimate Lightroom Masking’ 2-part Masterclass. The video below tells you all about it.

Part 1 is on Monday, March 27, 8 PM Brussels time, part 2 is on Wednesday, March 29, 8 PM Brussels time. But don’t worry if you can’t make it to the live sessions because everything will be recorded and your registration also entitles you to that recording at no extra cost so you can watch either the live, the recording or both!

Registration is now open. Take advantage of the discounted early bird rate using the links below. For a limited time, you pay only US$39.95 (including tax) instead of US$59.95 for both sessions, including the recording!

Lightroom Masking Tip: Making a Subject-Aware Vignette

It’s easy enough to add a vignette to your images in Lightroom Classic: just use the Vignette slider in the Effects Panel. But… you may have noticed that, if your subject isn’t smack dab in the center of your frame, the vignette might darken important parts of your subject. That’s when it’s time to call in the help of the new masks in Lightroom Classic. In this video, I’ll show you how to make a ‘Subject-Aware Vignette’

Introducing Ultimate Lightroom Masking

This is only a glimpse of what the new masks that were introduced in Lightroom 11 and further (dramatically) improved in Lightroom 12, can do. If you want to know ALL about them and drastically cut down on your Lightroom editing time, all while making those edits better, then sign up for my upcoming ‘Ultimate Lightroom Masking’ 2-part Masterclass. The video below tells you all about it.

Part 1 is on Monday, March 27, 8 PM Brussels time, part 2 is on Wednesday, March 29, 8 PM Brussels time. But don’t worry if you can’t make it to the live sessions because everything will be recorded and your registration also entitles you to that recording at no extra cost so you can watch either the live, the recording or both!

Registration is now open. Take advantage of the discounted early bird rate using the links below. For a limited time, you pay only US$39.95 (including tax) instead of US$59.95 for both sessions, including the recording!

A sneak preview from my new course...

As you may know by now, you have until October 18 to take advantage of the 5DayDeal. The 5DayDeal is a bundle of training and tools for photographers (tutorials, Lightroom presets, Photoshop actions) that is offered for only 5 days at an incredible discount: the normal value of the more than 50 hours of training included in the bundle is no less than US$2,200, but until October 18 you can get it for only US$98, that’s a whopping 95+% savings!

I am very honored that the folks over at 5DayDeal have asked me to contribute a course. I have created a brand new course, especially for this edition: Flash!Back II. Below you can watch one of the ten videos from the course for free, until October 18, noon PST, which is also when the 5DayDeal ends.

Did you find this video interesting? Did you learn something for it or did it inspire you to go out and make some portraits of your own? Then think about what you can learn from all the videos in my course, let alone all the videos in the 5DayDeal bundle. The MAIN bundle of the 5DayDeal bundle has over 50 hours of training and tutorials on various aspects of photography and image editing. But hurry, because time is running out and the same bundle never goes back on sale!

Extra bonus for MoreThanWords customers!

One important last thing... I know you probably have your choice of sources to purchase the 5DayDeal from. That's why I'll throw in a cool bonus! lf you purchase through the links on this page, you can choose 1 of the following tutorials of mine for free! *

  1. My Photoshop for Lightroom Users course (a $89 value)

  2. OR: my Lightroom Library beyond the Basics course (a $79 value)

  3. OR: my Texture Pack 1 + 2: a set of 45 super high-res textures and backgrounds (a $50 value)

  4. OR: my Texture Pack 3, 4 & 5: a set of 60 super high-res textures and backgrounds (a $50 value)

  5. OR: my Location Lighting Masterclass course (a $89 value)

  6. OR: my Lightroom Presets Pack and my Creative Profiles Starter Pack (a $50 value)

  7. OR: my Black & White Creative Profiles Pack and my Creative Profiles Pack, Vol. II (a $50 value)

You'll receive an email from me after the 5DD ends, to let me know which of the bonuses you'd like.

If you’re into portrait photography (and if you’re not, you would not be on this page), below is a breakdown in green of all the courses in the 5DayDeal that relate to portrait photography. As you can see, there’s quite a lot of them!

Luminar Neo Webinar Replay

Until Sunday, June 12, 23.59 CEST, you can watch the replay of my ‘Introduction to Luminar Neo’ webinar. The webinar is packed with interesting tips on how to get the most out of Luminar Neo.

Webinar Replay

Want to watch the webinar at your own pace, when you want and where you want? The recording is also available for purchase for only US$14.95.

Don’t forget that if you purchase Luminar Neo through any of the links below, and you email your proof of purchase to info-at-morethanwords-dot-be, you’ll get the download of the recording for free!


The cheapest way to upgrade to Luminar Neo

In the video below I tell you how, as an existing Luminar customer, you can upgrade to Neo as cheaply as possible. And I'll even show you a little trick that allows you to score a free Luminar preset pack!


This is the cheapest way to get Luminar Neo as a new customer!

Not a Luminar user at all yet? Now is the time to change that, because for only US$59 you can currently buy a license for 2 computers for Luminar Neo and another two licenses for its predecessor Luminar AI. I tell you all about it in this video.

Free Luminar Neo Webinar

Tuesday, June 7th, at 8 PM CEST (that’s 2 PM in New York or 11 AM in Los Angeles), I’m doing a free webinar ‘Introduction to Luminar Neo’. Luminar just got a big update with the new Mask AI feature and in this webinar, I’ll show you all about it. I’ll also cover how to use Luminar as a standalone application versus as a plug-in for Lightroom and Photoshop and I’ll highlight the main differences with Luminar AI, so that you’ll know whether or not you need to upgrade.

Below is a short video showing you a sneak peek at the new masking feature. Lots more examples in the actual webinar!